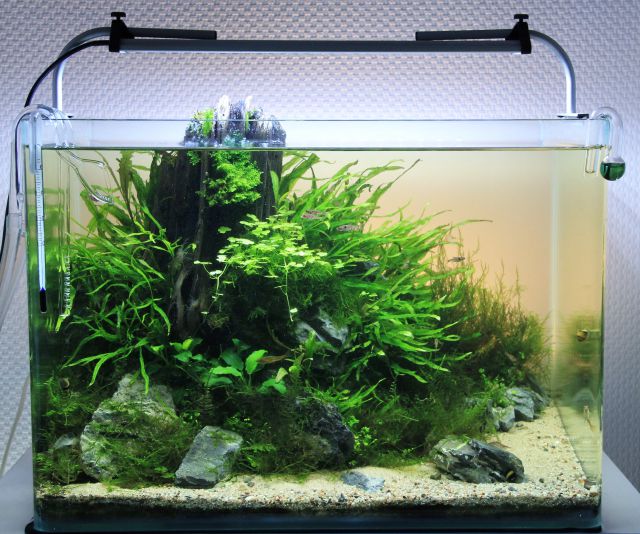
Decorative sand zones are very popular in aquascaping - be it as a stripe in the foreground or a narrowing path leading into the background and giving the layout more optical depth. The benefit of using sand as a visible substrate shows itself best in being better able to desig in more detail in the foreground. This is realized by placing solitary, smaller plants or smaller fragments of the hardscapes used in the layout in the shape of stone shards or driftwood pieces. An open sand area makes the whole aquarium look much brighter. With differently-coloured sands, many different impressions can be created: pure, white sand looks rather cool, whereas natural sand in more yellow hues creates a warmer impression.

A warmer impression is created when using yellow sand.
Most plant aquarists don’t want to do without the benefits of highly nutritious soil to provide an optimal supply to their aquatic plants. Decorative sanda on the other hand, are basically free from nutrients. For this reason, most aquascapes consist of both types of substrate, meaning, that the sand is only used for decorative, open areas, while highly-nutritious substrates are used in the densely-planted back of the aquarium. At the points of contact between sand and soil, two very different substrates meet each other, that are, above all, not supposed to mix. Especially for reasons of aesthetics it should be avoided to let the dark grains of a soil substrate “deface” a bright sand area. This is no easy task at all, because natural erosion and having burrowing fish and shrimp in your aquarium basically ensures that the substrates will mix at some point. We share some important tips with you regarding the care and set-up of such an aquascape using different substrates, while keeping the workload as small as possible at the same time.
Using natural barriers
The simplest and most natural way to seperate substrates is to use the hardscape elements as barriers. This means placing pieces of wood or stones at the separating edges between soil und sand, to prevent a mixing of the two types of substrate. Strategically you best approach this method by first using bigger hardscape pieces and then arranging smaller and smaller stone pieces. These are obtained by crushing larger pieces of stone with a hammer. Alternatively, ready-to-use substrates in coarser grains can be used. These are commercially available in many colours.
Gaps between big hardscape elements are filled with gradually smaller pieces. We’ll show you a small series of pictures about how to set up an aquascape with a sand are in the foreground:
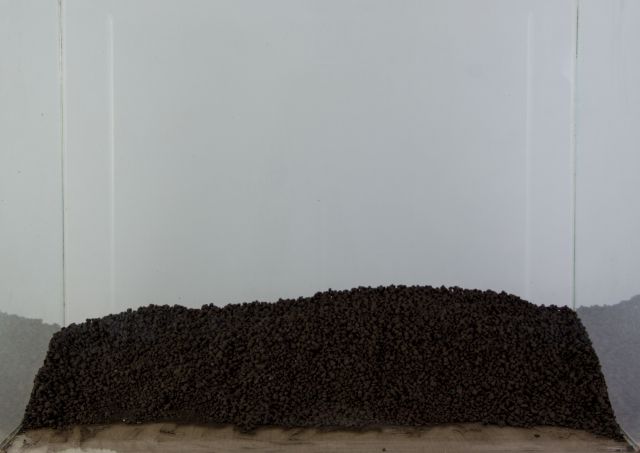
First the soil is raised in the back.
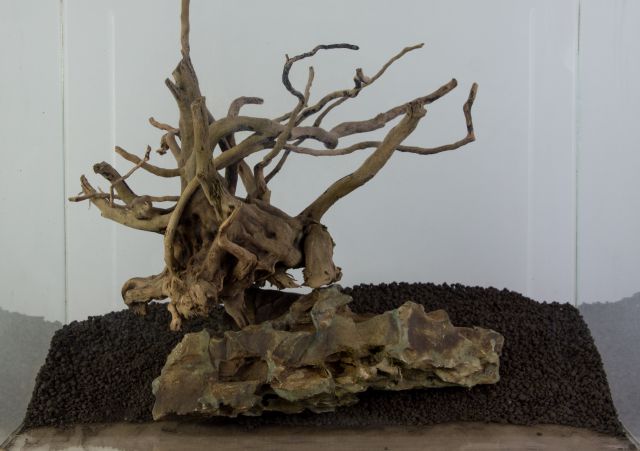
The main elements of the hardscape are placed.
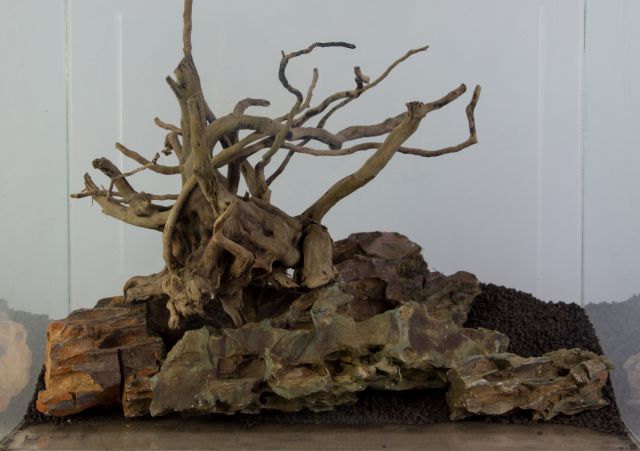
More, medium-sized stones are placed as barriers.
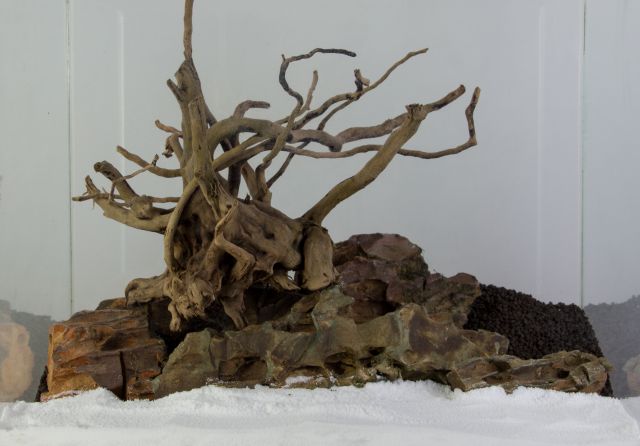
Now the sand is added. The area is smoothed out using a brush or sand flattener.
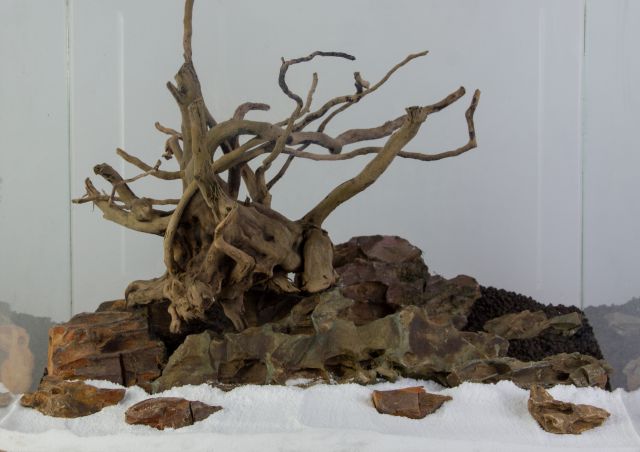
More, smaller stones are added.
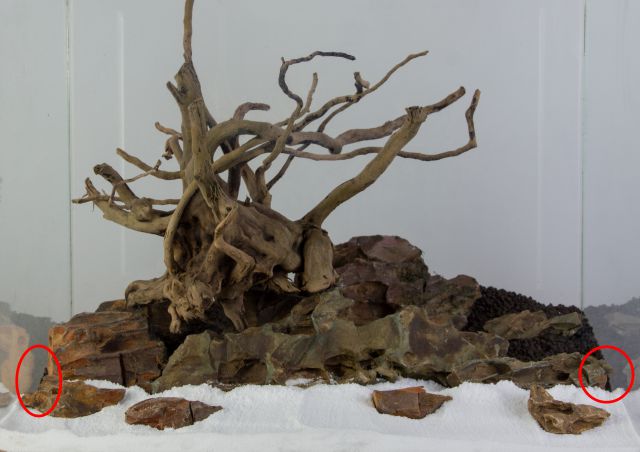
Small, direct transition points between sand and soil are still present (marked red). These gaps need to be closed by all means.
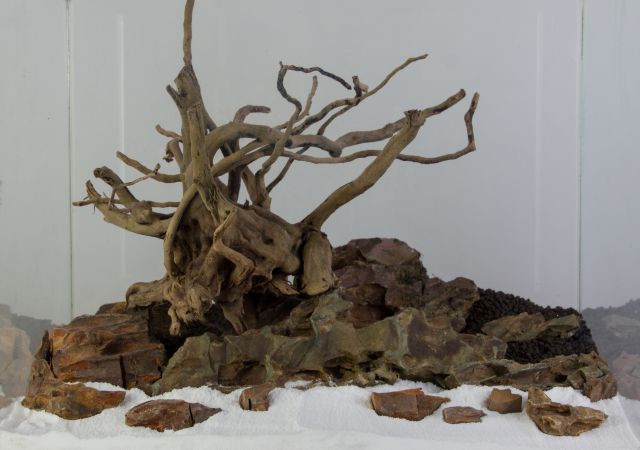
Gradually smaller fragments are placed. With them, tiny gaps are closed and details defined in the foreground.
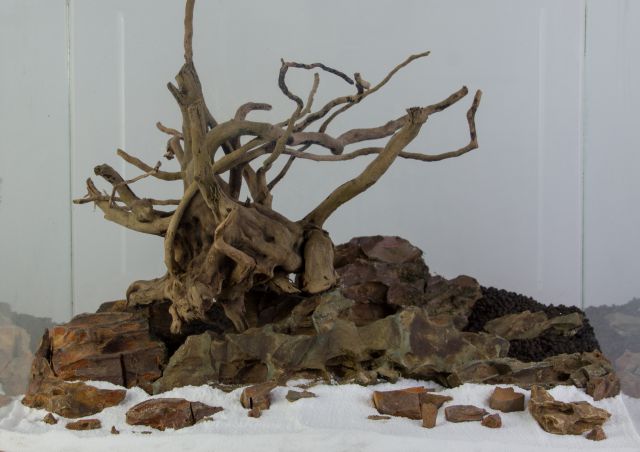
At last, tiny stone splinters are added which play around the larger pieces in the sand, creating even more delicate details.
Plants are very useful as fillers as well, especially the various mosses, which are just jammed into the resulting cracks and graps. Especially in the transitional zones at the side panes of the aquarium tank, mosses are a good solution, acting as a "buffer" to prevent direct contact of stones and glass.
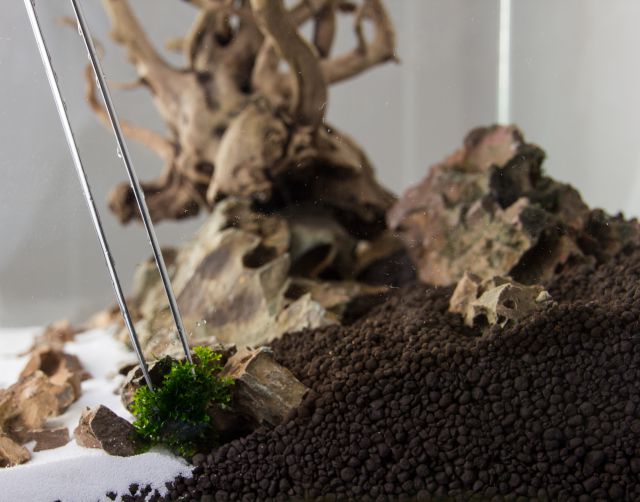
Direct transitions
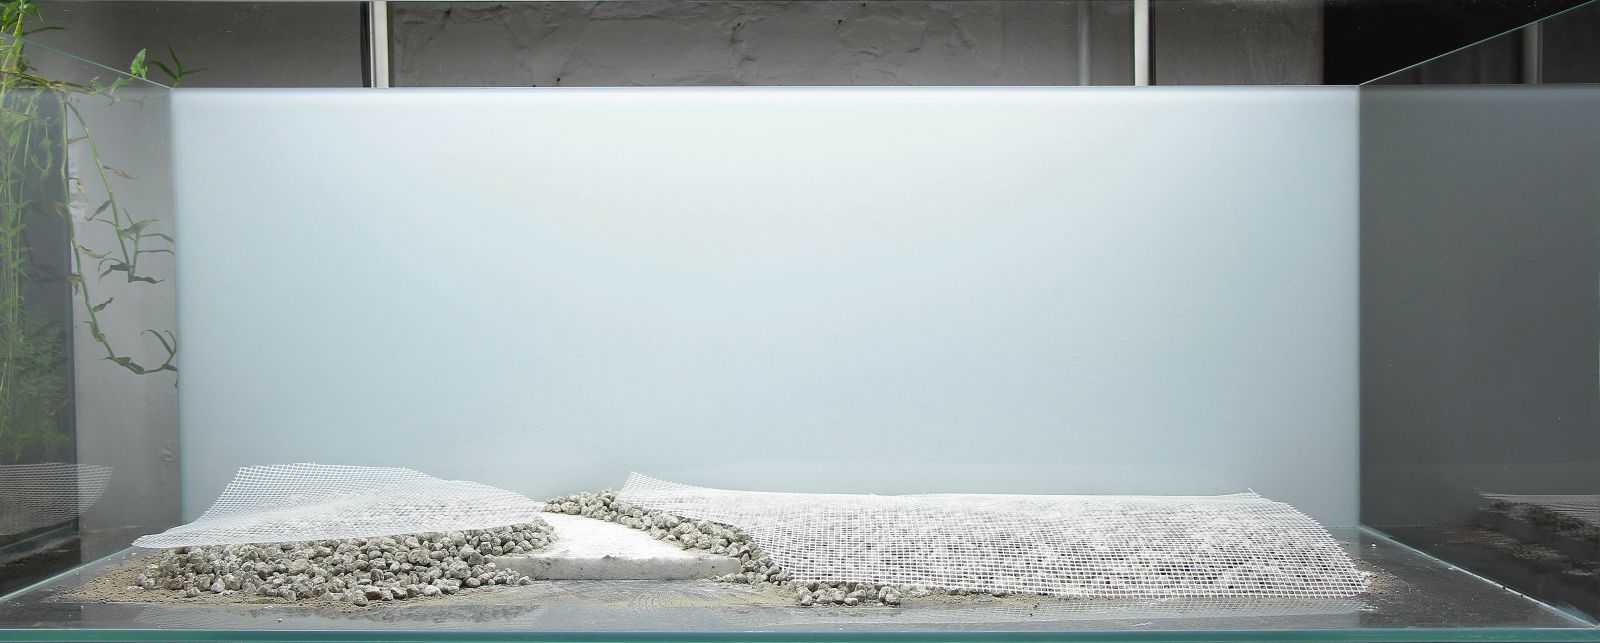
If sand and soil- areas meet directly (without natural barriers via stone or driftwood decoration), we recommend the use of a dividing layer, made of multi-skin sheets, pond liner or PET foil. All materials are available in hardware stores or in craft supplies and have different properties. Pond liner is black, can easily be cut to size and is wonderfully flexible. PET foil is often transparent, but a bit more rigid. Multi-skin sheets are usually transparent, very sturdy and easy to cut, given an appropriate thickness. All materials tend to show a certain buoyancy and need to be weighted down with substrate or wedged between something. The areas with soil, meeting sandy areas directly, are often planted with ground cover. After they have spread over the substrate, their roots will keep the soil granules together. At this point of time, you can remove the sheets or soil, since now the plant carpet prevents a mixing of the substrates.
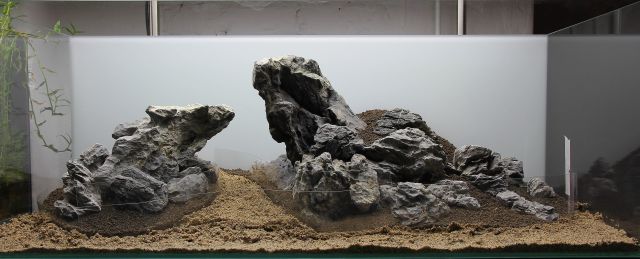
Transparent PET foil takes care of a separation between sand and soil.
Erosion prevention
To create a more profound sense of depth, the rear substrate (here: soil) is often layered higher than the substrate in the foreground (here: sand). By using vertical barriers as described above, you can severely restrict the mixing of the two substrates. Even though the plants keep the substrae together with their roots, individual soil granules may roll onto the sandy are due to the sloping design. In this cross section the slope is clearly visible:
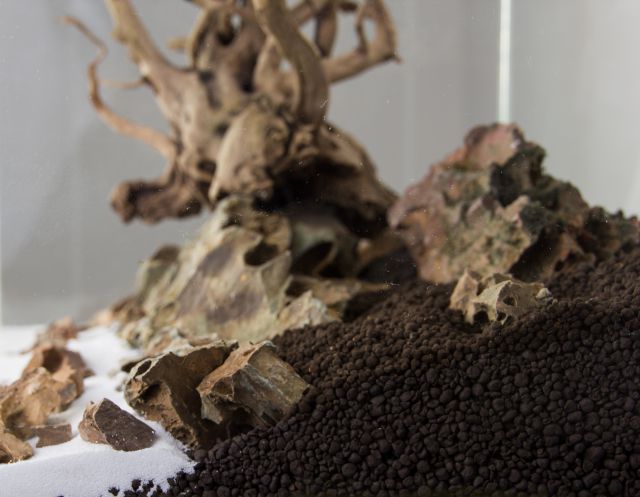
Burrowing aquarium inhabitants like shrimp do their part in making soil slide down. The remedy here, is an additional, horizontal barrier. Moss pads fixed on flat stone shards or slate are very suitable for this. Commercially available mosses that are already being sold as pads can be used splendidly for this purpose as well.
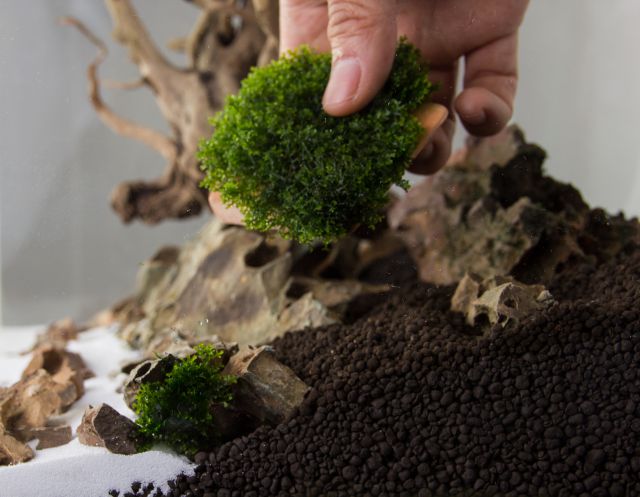
The moss pads are placed onto the substrate just behind the barrier made from hardscape elements. The pads or stone slabs also provide sufficient weight to keep the mosses down.
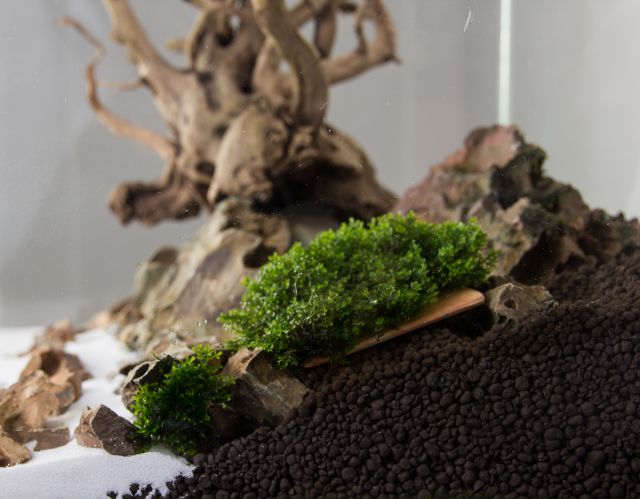
Care should be taken to use moss species that are as dense as possible and capable of anchoring themselves to the ground, so that the moss can attach itself to hardscape and soil particles over time.
The rest of the planting can commence behind the moss pads, with ground cover, middle ground or stem plants. The layer of moss between sand, hardscape barriers and rear planting also creates a beautiful, natural transition.
For depth-effect reasons, the soil substrate of an aquascape has a strong upwards slope in the rear as well. Here it is possible to keep erosion at bay by using barriers, as well. Apart from natural remedies like cleverly placed hardscape or plants with pronounced rooting (e.G. crypts), substrate dividers made of pond liner or PET foil are better suitable for larger, open areas. Multi-skin sheets are especially suitable due to their stability. They are just stuck into the soil in an angle to stabilize the substrate like a terrace.
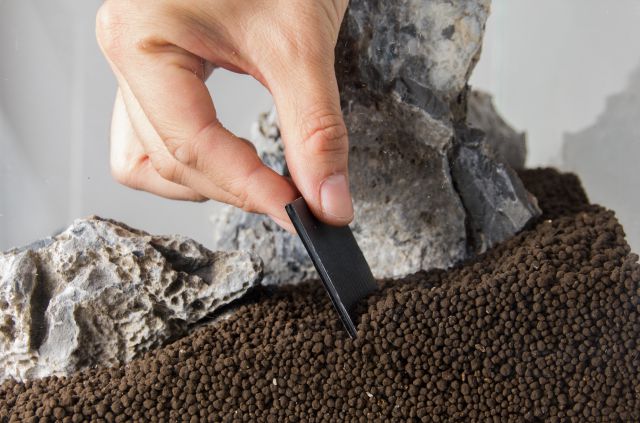
Multi-skin sheets can be pushed so deeply into the substrate, that only a small part of them pokes out at the top.
Care
If you want to maintain an immaculate look of your sandy areas, a certain amount of maintenance is needed. With time, sludge, fish excrements or plant residue collects on the sand. This should be regularly removed by siphoning it away with a hose e.G. during the weekly water change. A sufficient stock of shrimp and snails will also ensure, that as much dead, organic material is processed as well. A sand flattener can be used to easily re-model the sand to e.G. restore slopes.

A mild outbreak of cyano bacteria at the transition between sand and tank glass can sometimes happen. This is to be considered normal and no reason to worry. The affected sand can be removed and replaced during siphoning. A well-aimed squirt of hydrogen peroxyde, discharged onto the affected spots in the sand, will also help. Here you’ll find detailed instructions for local algae elimination with hydrogen peroxide.
Other means of separating substrates
There are other scenarios, where a separation of substrates or the use of barriers makes a lot of sense. Many manufacturers of complete substrate system also make use of various additives and layers. Often a special culture medium is used as the bottom layer, together with porous materials such as pumice or lava gravel.

In addition, there is usually a layer of optically more beautiful gravel or soil on top, which is supposed to prevent direct contact of the lower layer with the water. To prevent a mixing of substrates, a mesh fabric can be used. The coarse mesh still allows for plant roots to reach the lower layers.
